
How to fill your punching bag and heavy bag
There are two reasons to fill your own punching bag: Firstly, it’s cheaper to buy an empty punching bag (as opposed to one that is complete), and secondly you can choose how dense and/or heavy the filling has to be.
It’s relatively simple to fill a punching bag – as long as you know which materials to use, and how to prepare those filling materials. Doing it right will keep you safe, and make your punching back last longer.
If you are just starting out, you may not want a heavy bag, so you may choose to fill it with old clothes or even scraps for fabric to fill it with. If you are beyond the starting phase, you may want to consider something like sawdust or sand – which will make it heavier, and add some resistance to your punches (and your kicks, depending on your fighting style).
HOW TO FILL A PUNCHING BAG PART 1: CHOOSE A FILLING
Decide how heavy you want your bag to be, and how dense it has to be. The heavier the bag is, the harder you will have to punch to move it. On the other hand, a lighter bag will tend to sway more when you punch it. As such, the ideal filling will depend both on how hard you hit, and your weight. A person of lighter build can throw a hard punch, and still not have the same impact (on the punching bag) as a heavier person throwing a medium-hard punch.
If you are new to boxing (or kickboxing/martial arts), it is best to start off creating a lightweight punching bag. Keep in mind that, since you control the filling, you can add more – or heavier – filling as you become stronger over time.
Generally speaking, your punching bag should weigh about half as much as you do. Once again, this number is subject to your level of experience, and how strong your punches are – so this number can increase or decrease to suit your personal needs.
HOW TO FILL A LIGHTWEIGHT PUNCHING BAG
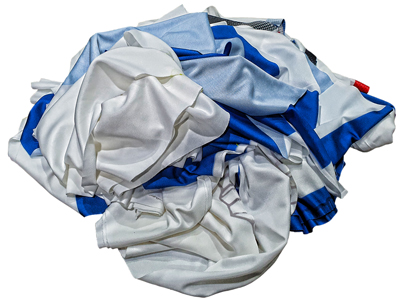
If you need a lightweight punching bag, simply fill it with old clothes or just odd bits of cut-off fabric. In fact, when you buy a lightweight punching bag it is likely to be filled with strips of fabric. Filling your bag with (only) fabric/clothes places a limit on how dense or heavy it can be, so it’s a good choice if you prefer your bag to sway when you punch or kick it.
Note: If you don’t have enough old clothes or fabric to fill your bag, you can get usually get some for cheap at a second-hand- or charity store. You can also get some cheap off-cuts from a sewing factory or seamstress. Any type of fabric – or clothing - will work.
HOW TO FILL A HEAVY BAG
If you want your punching bag to be somewhat heavier, you can add some sawdust – or even sand – to add some weight. If you need your bag to have more resistance to your punches (and kicks) both sawdust and sand are easy to come by, and cheap. You can usually get both from your nearest home improvement store.
Note: Do not use ONLY sand or ONLY sawdust to fill your punching bag – it will simply be too heavy to use. Fill it with a combination of fabric/clothes and sand/sawdust. How much you use of each will depend on what you want your bag to be like when you are done.

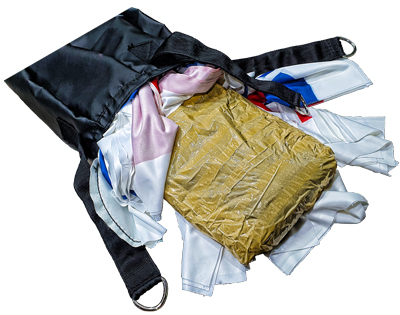
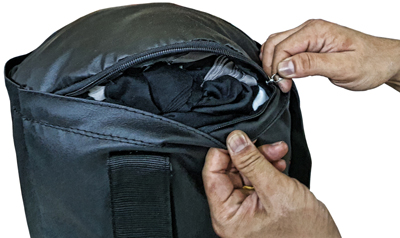
REMOVE ALL HARD OBJECTS
Firstly, remove all of the hard objects from the clothing – like zippers, buttons, metal inserts, etc. Doing this will prevent your filling from damaging the inside of your bag – and from eventually tearing it. It’s fine if you cut the clothing into pieces while doing it – how they look makes no difference once you place them inside the bag.
Note: The smaller or narrower you cut the fabric or clothing, the denser your punching bag will be. You will of course need more fabric/clothing if you do this.
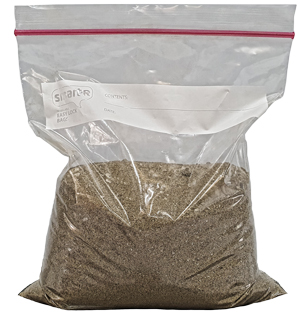
USE RESEALABLE BAGS
If you add sawdust or sand to your punching bag, put it into re-sealable bags if you have any – or find something else to put it in. If you just pour the sand or sawdust over the clothes, it will eventually work its way down to the bottom of the bag, and besides causing uneven weight distribution (and resistance), it can damage the bag in the long run.
The best size bag to use is around on quart (US) or one litre. Just be sure to seal the sand-/sawdust bags well so the contents don’t come out after a while.

REINFORCE THE RESEALABLE BAGS
Wrap every sand-/sawdust bag with duct tape – completely. This will ensue that the bags can endure punches for a long time without their fillings coming out.
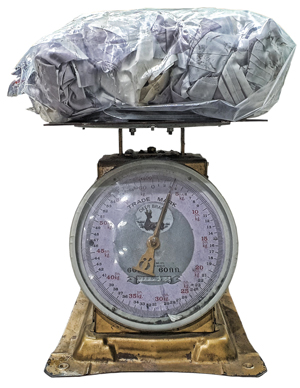
WEIGH THE WEIGHT OF YOUR PUNCHING BAG FILLING
In order to ensure that your bag will be as heavy as you want it to be, weigh everything. You can put the fabric in large plastic bags, and use a scale to weigh each one. Sand bags can be weighed individually. Add it all up to see how heavy your punching bag’s filling will be.
If you find you need more weight, you can add more sand or more sawdust to increase the density of your bag. On the other hand, if you want to increase the weight without increasing the density, add more fabric or clothes.
Remember that – in general – your punching bag should weigh around half as much as you do – but ultimately, that weight depends on your level of experience/skill, and what you want to achieve. If you are new to boxing/kickboxing, you may want to have it a bit lighter. On the other hand, if you are experienced, you may want to make it heavier.
ADDING YOUR PUNCHING BAG FILLING
Most punching bags typically have a round opening which is zipped closed – that’s where your filling goes in. In some cases there will be a different mechanism – if need be, check the manual or check online to see how it works.
Add your first layer of filling at the bottom of the punching bag. If all you plan to use is clothes and/or fabric, just drop enough into the bag so the bottom is covered completely. If you plan to add bags of sand or sawdust, drop one in first, and then cover it up with fabric or clothes.
Packing clothes or fabric around the sand-/sawdust bags will help to protect the plastic bags from tearing (as you keep raining punches and kicks on the punching bag over time). The sand or sawdust is there to add weight, but when you hit the punching bag, you shouldn’t make direct contact with any of them.
Use a long tool with a blunt end to push the filling down. A baseball bat works well, but you can use anything long enough to reach down all the way. Compacting the filling will ensure an even striking surface, and it will also eliminate empty spaces in the bag.
Note: If you are adding sand-/sawdust bags, don’t push down on them directly – you could cause a small tear that will worsen over time.
Continue to add new layers of your preferred filling, and pack them down/compact them as you do. If fabric/clothing is all you use, just pack each level down as you add it. If you are adding sand-/sawdust bags, be sure to drop each bag into the middle of the punching bag, and then surround it with clothing and/or fabric before you start packing it down.
Remember to space the sand-/sawdust bags evenly over the length of the punching bag – to ensure even weight distribution. Depending on how many sand-/sawdust bags you plan to add, that could mean that you won’t be adding one to every layer of fabric/clothing.
For instance – if your punching bag is say, 5 feet or 1,5m long, and you need to add 5 bags of sand or sawdust, you will need to add one bag for every one foot or 30cm. However, if the layers you pack are say, six inches or 15cm deep, you will only add one sand-/sawdust bag to every other layer of filling.
Once your filling reaches the top, close the zipper (or whatever closing mechanism your punching bag came with). Be sure that your punching bag is filled right to the top – there shouldn’t be any empty space left. On the other hand, if you struggle to close it because the stuffing is too much, you may need to pack down/compact the filling some more. Be careful, though, to not damage any sand-/sawdust bag. If it proves too difficult, remove bits and pieces of the top layer until you are able to close the punching bag.
The Punching Bag Factory is one of Thailand's best custom punching bag manufacturers, and we are specialized in all over printed punching bags. We guarantee you the best price and quality, contact us for a price quotation.